User Guide
Magoware helps companies to deliver their content, through three useful tools:
• A powerful portal to manage customers and content.
• Intuitive and user friendly applications.
• Integration with 3rd party services facilitate every day work.
The Portal of Management allows every department on the company to organize their job:
-
Customer Care may check and update user’s status and their subscriptions to help them.
-
Technical staff may load the content in 1 minute, and be ready to deliver it.
-
The sales department may notify the users to the new offers by sending them customized messages on their screen.
-
The administrator have full control of daily operations done by system reports.
-
The company receives detailed reports about sales and products in one click.
End user applications are available on every platform, from smartphones to smart TVs.
-
User may watch their favorite program live, schedule a notification for a future one, or play one from the recording servers.
Integration with third party systems facilitates the subscription process to a level where no user interaction is required to activate the service.
On the other hand, analyze their user’s behavior using tools like Google analytics and other methods.
We not only build and brand the solution according to our customers’ requirements, but we also walk them through the entire process, help them make wise choices and deliver qualitative services.
We are continuously enhancing and developing new features.
New Customer

In the left panel, “New Customer” menu you can register every new customer.
To register a new customer you must first create customer groups.
It is important to create these groups so you can be able to distinguish different types of clients.
Create customer and account.
Username & Password - are important for the login.
Group – Select one from the goups you created.
First name – Customer firstname.
Last name – Customer lastname.
Email – Customer email.
Address – Customer address : street, house number etc.
City – Part of customer address.
Country – Part of customer address ( you must choose from the dropdown list).
Telephone – Customer phone number.
Sale mac address.
Channel Stream Source – You must choose from the dropdown list.
Vod Stream Source – You must choose from the dropdown list.
Pin – The pin must have min 4 numbers (it's necessary if the customer wants to activate of deactivate the shown of adult content).
Activity Time Out – After how many sec of inactivity should the person be redirected to the main menu.
Timezone – Timezone based on the customers location.
Get Messages – Enable/Disable (depends if the customer wants to receive push messages).
Receive Ads – Enable/Disable (depends if the customer wants to see different ads).
Show Adult Content – Enable/Disable.
Auto Timezone – Timezone is set automatically.
Account Locked – Enable/Disable (the company can log out the customer).
Is tester – Enable/Disable.
After you have filled the fields with the correct information you must click Submit.
Packages
Packages are used to group channels or vods. You can choose between two packages STB and MOBILE. We use “Plans” to create products and to add packages (to group them).
To create a package you first have to choose if you want to create a Live Tv Package or a VOD Package.
If you want to create a Live Tv Package you must:
1. go te settings
2. choose Plans and Packages
3. choose Live TV Packages

Plans
.png)
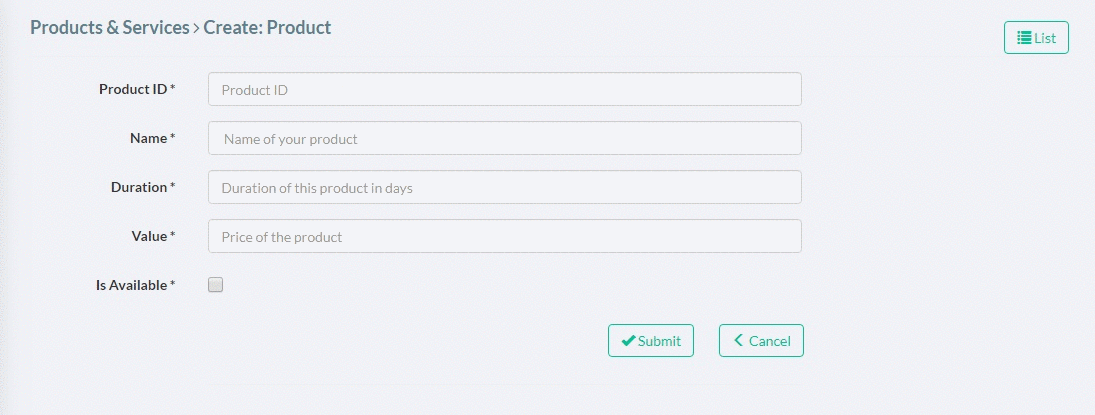
To create a plan you have to:
1. Have a product ID.
2. Name the product.
3. Choose the days this product will last.
4. Choose the value of the product.
5. Choose if the product is available or not.
After you click Submit, you have the option to add Packages to your plan.
You must choose:
-
the product,
-
the package
You can pick either a Live TV package or a VOD package.
Live TV Channels
In “Live TV Channels” we have the Genres that are necessary for the categorization of the channels that we are going to create, and streams that are added after the creation of the channel. When creating channels you must always choose HLS as stream format.
Genres
To create genres for Live TV Channels you must go to Video Content Management and:
-
click Live TV Channels
-
click Categories/Genre
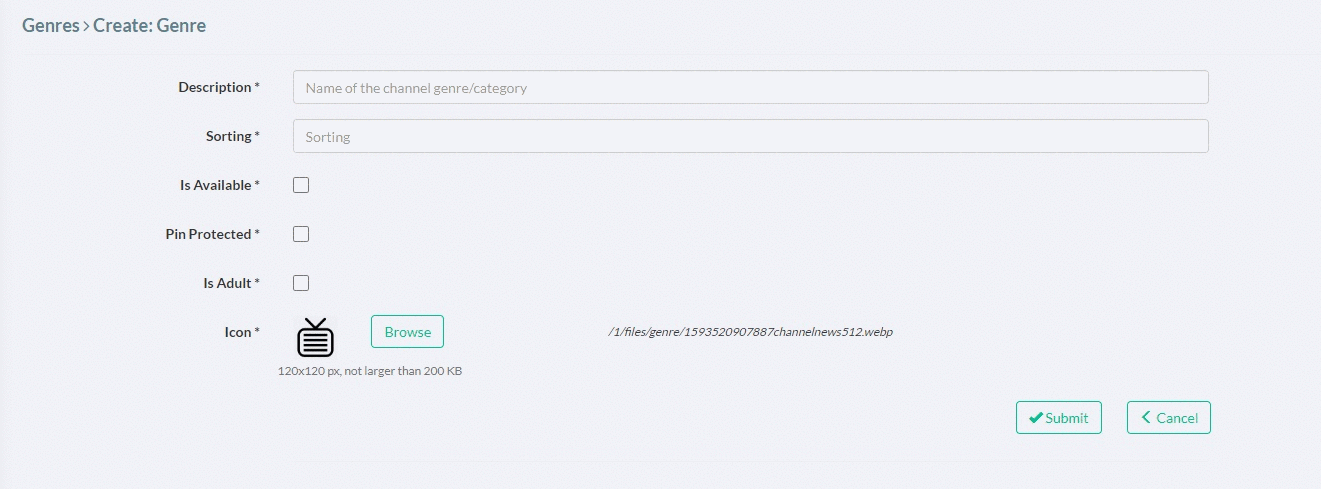
The steps you must follow to create a genre:
-
Description – name of the genre.
-
Sorting – the positioning of the genre.
-
Is Available – if the genre you are creating is going to be shown to the customer.
-
Pin Protected – for the genres that include adult content.
-
Icon – you must choose a icon for the genre.
-
Submit.
Channels
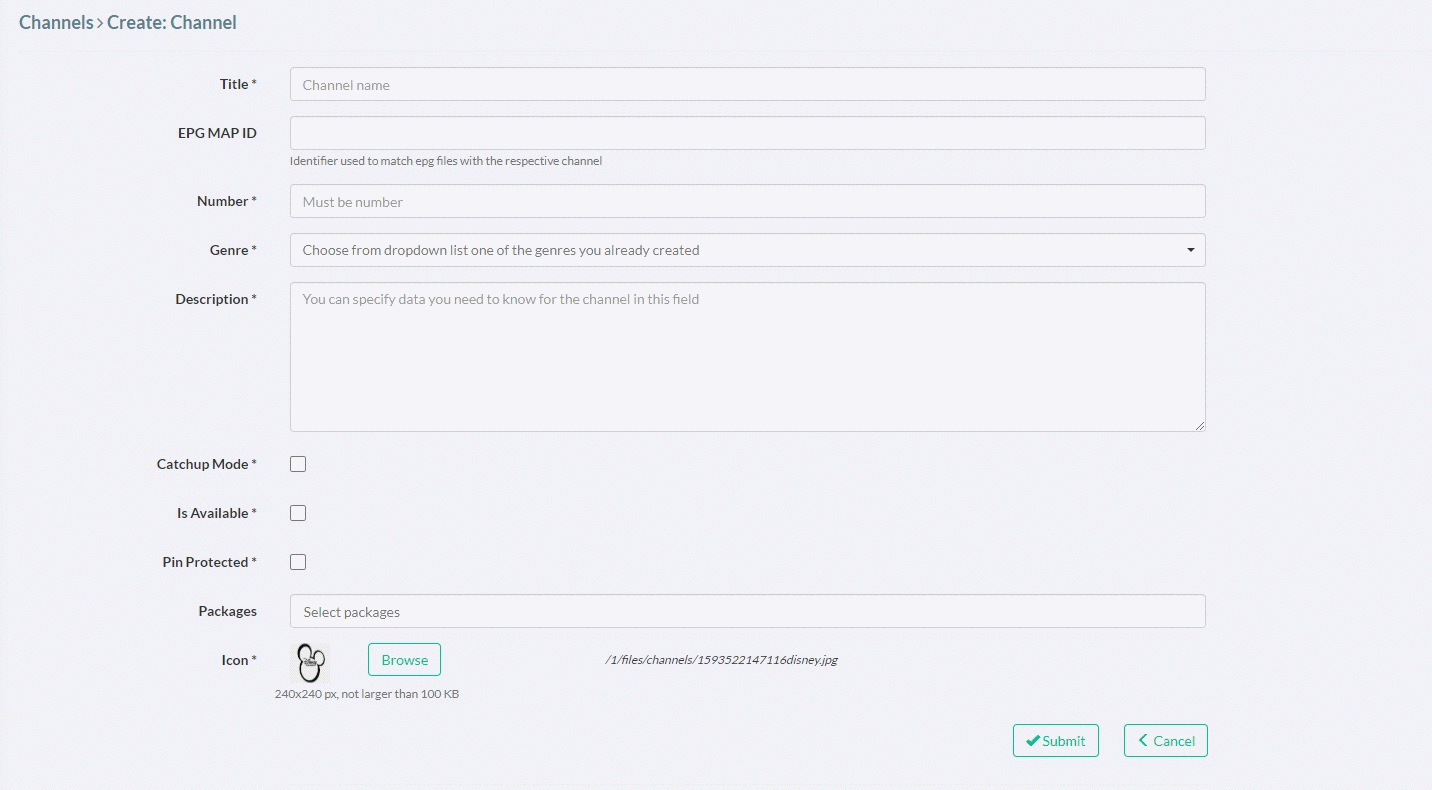
To create a channel you must fill the field shown in the picture above:
-
Title – the name of the channel.
-
EPG MAP ID – the channel id you have in EPG Data that you have imported.
-
Number – the number of the channel.
-
Genre – you must choose one of the genres you have created.
-
Description – you can write specifications about the channel.
-
Is Available – if the channel will be available for the customer.
-
Pin Protected – if the channel will include adult content.
-
Packages – you can choose one or more of the packeges you have created.
-
Icon – the icon of the channel.
Channel Streams
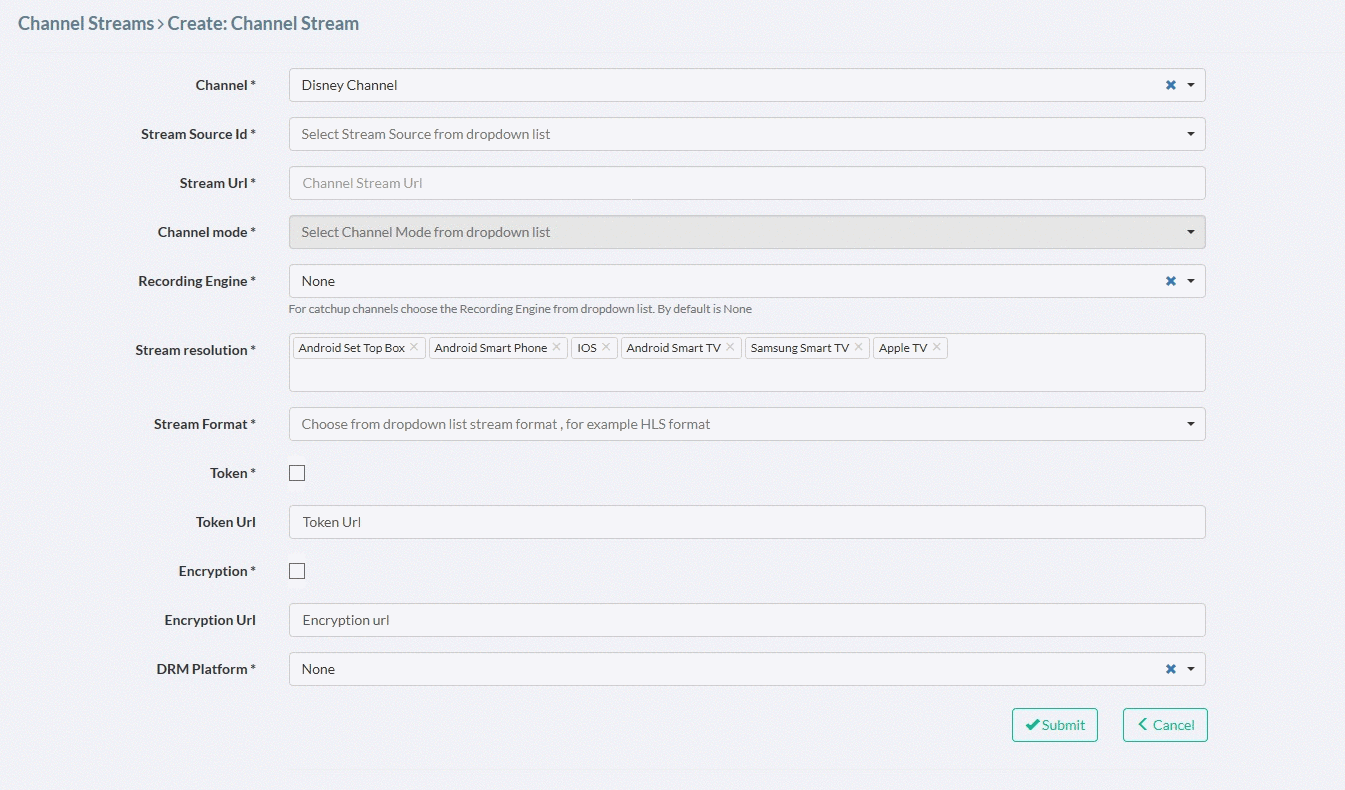
After creating a channel you must create one or more channel streams.
-
Channel – you choose the channel for which you are creating the stream.
-
Stream Source Id - select stream source from dropdown list.
-
Stream Url – you must insert the stream url.
-
Channel Mode – you can choose between Live TV Stream and Catchup Stream.
-
Recording Engine – you must choose NONE.
-
Stream Resolution – stream resolutions are filled automatically.
-
Stream Format – you must choose HLS (HTTP Live Streaming).
-
Token – unchecked.
-
Token Url – you don’t need it when Token is unchecked.
-
Encryption – unchecked.
-
Encrytion Url – you don’t need it when Encryption is unchecked.
-
DRM Platform – you must choose NONE.
-
SUBMIT.
VOD Content
VOD allows browsing through available VOD content catalogue, checking information about the selected movie.In “VOD Content” you are going to create Vod Menus, Genres, Videos and Streams. Before you create the content you must first create the VOD Menu and VOD Genres. After creating "Genres" you can create movies at "Videos and Streams" and categorize them in Vod Menu.
VOD Menu
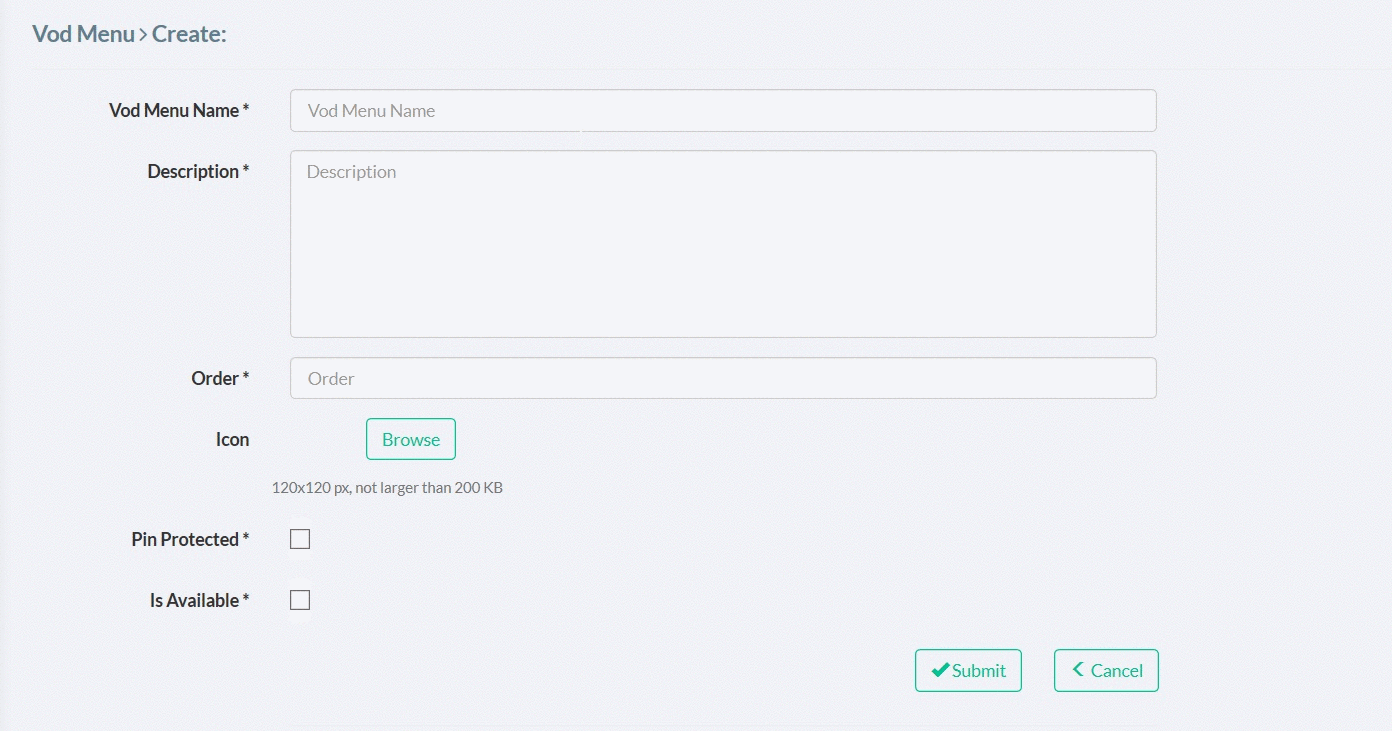
Vod Menu Name – you specify the name of the menu.
Decription – you must write a description about the specifics of the menu.
Order – the position of the menu.
Icon – the icon of menu.
Pin Protected - if the menu will include movies with adult content.
Is Available - if the menu will be available for the customer.
Genres
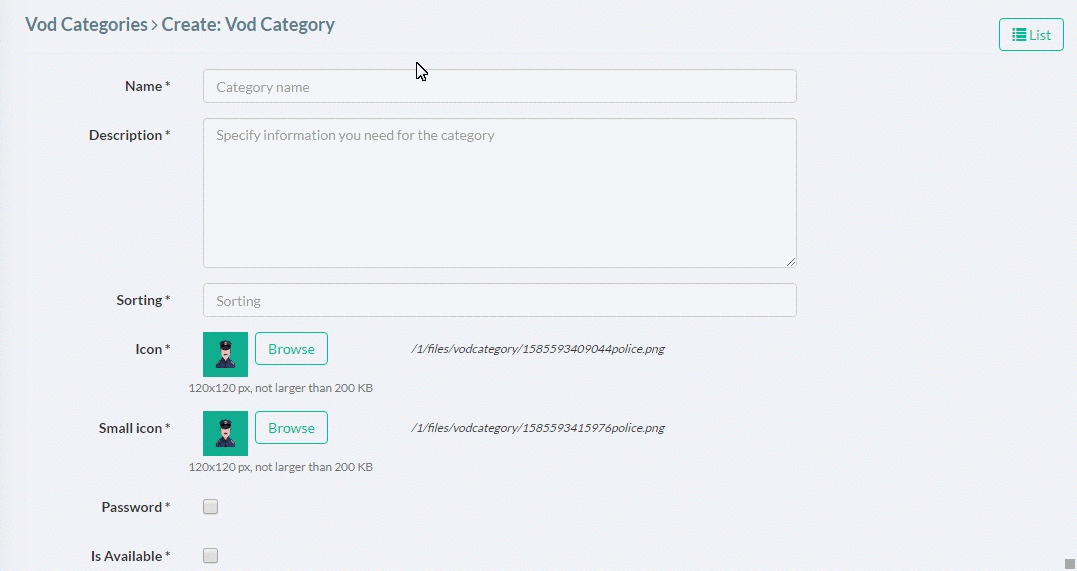
Here are the steps you must follow to create a genre:
-
Name – the name of the category/genre.
-
Desription – you can specify information regarding the genre.
-
Sorting – the positioning of the genre.
-
Icon – you must choose a icon for the genre.
-
Small Icon.
-
Is Available – if the genre you are creating is going to be shown to the customer.
-
Password – you can setup a password for genres that contain adult content.
-
SUBMIT.
Videos And Streams
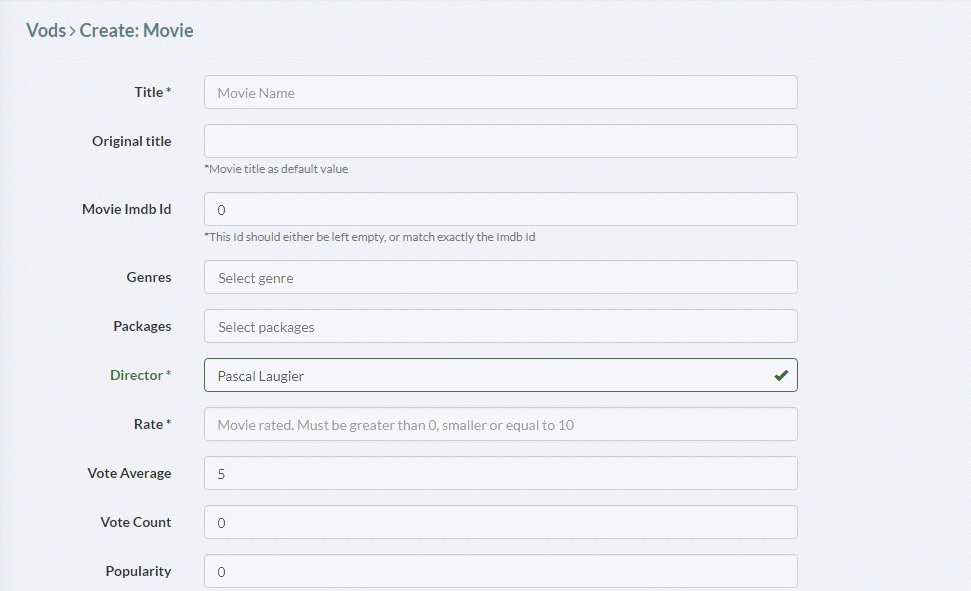
The steps you have to follow to create a movie on VOD:
1. Title – the title of the movie.
2. Original title – the original title of the movie (if the movie has another version).
3. Movie Imdb Id.
4. Genres – you can choose one or more genres.
5. Packages – you can choose one of the packages or both of them.
6. Director – the director of the movie.
7. Rate – the rating of the movie.
8. Vote average – how the viewers have voted the movie.
9. Vote count – the number of votes.
10. Popularity.
11. Clicks – how many times have people clicked the movie.
12. Duration – how long does the movie lasts.
13. Short description – a short description about the movie.
14. Description – a description about the movie, what is it about.
15. Starring – the starring actors.
16. Trailer url – movie trailer.
17. Movie website – you can write the website of the movie if it has one.
18. Icon – you can insert an icon for the movie.
19. Image – you can insert an image for the movie.
20. Pin protected – it will be required for the customer to insert the pin in order to watch the movie.
21. Has adult content.
22. Is Available – if the movie you are creating is going to be shown to the customer.
23. Expiration date – content right (for how long has the movie been bought).
24. Price – the price of the movie(if it has 0 costs it will be included in one of the packages, if it has a cost it will be sold individually).
25. Mandatory ads – disabled / enabled.
26. Revenues – movie revenues.
27. Budget – the budget of the movie.
28. Original language – the language in which the movie was made.
29. Spoken languages – filter values.
30. Release date – the date in which the movie will be disponible.
31. Status – if the movie is released or still filming.
32. Default subtitles – the subtitles disponible.
33. SUBMIT.
TV Shows
To create a TV Show you must first create the serial, seasons and episodes. The genres are the ones you have created for the VOD Menu.
You can find the TV Shows at VIDEO CONTENT MANAGEMENT menu.

Serials

-
Title – the title of the show.
-
Movie Imdb Id.
-
Genres – you can choose one or more genres.
-
Packages – you chan choose one of the packages or both of them.
-
Director – the director of the movie.
-
Rate – the rating of the movie.
-
Clicks – how many times have peoples clicked the movie.
-
Description – a description about the show, what is it about.
-
Starring – the starring actors.
-
Trailer url – movie trailer.
-
Icon – you can insert an icon for the show.
-
Image – you can insert an image for the show.
-
Pin protected – it will be required for the customer to insert the pin in order to watch the show.
-
Has adult content.
-
Is Available - if the show you are creating is going to be shown to the customer.
-
Expiration date – content right (for how long has the show been bought).
-
Mandatory ads – diabled / enabled.
-
Revenues – movie revenues.
-
Bugdet – the budget of the show.
-
SUBMIT.
Seasons
-
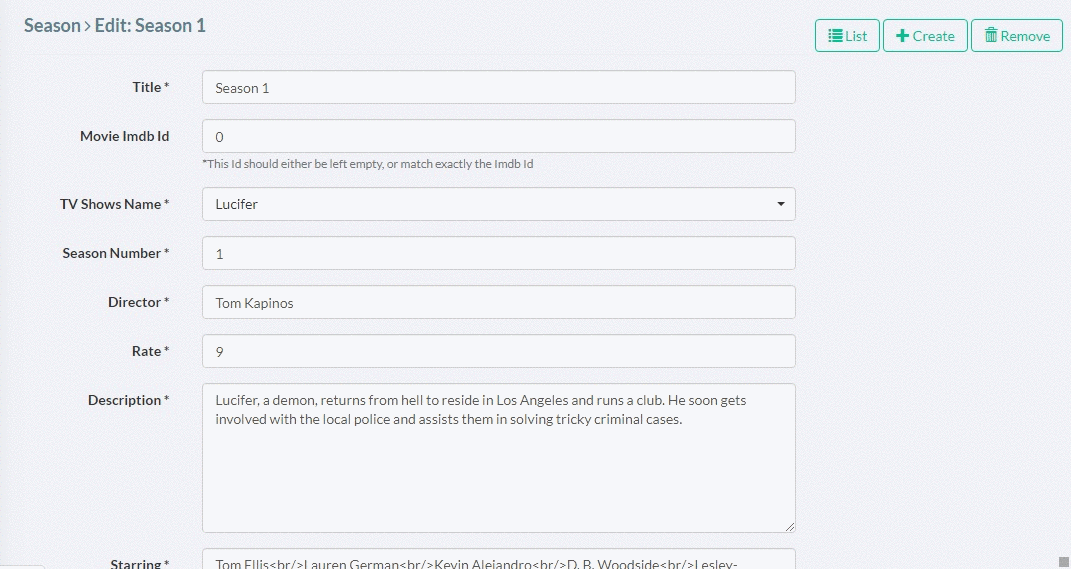
Title – the title of the season.
-
Movie Imdb Id.
-
TV Shows Name – you can choose one of the TV Shows you have created.
-
Season Number – the number of the season.
-
Director – the director of the season.
-
Rate – the rating of the season.
-
Description – description about the season, what will it be about.
-
Starring – the starring actors.
-
Trailer url – season trailer.
-
Icon – you can insert an icon for the season.
-
Image – you can insert an image for the season.
-
Pin protected – it will be required for the customer to insert the pin in order to watch the season.
-
Is Available - if the season you are creating is going to be shown to the customer.
-
Expiration date – content right (for how long has the season been bought).
-
Mandatory ads – diabled / enabled.
-
Revenues – season revenues.
-
Bugdet – the budget of the season.
-
SUBMIT.
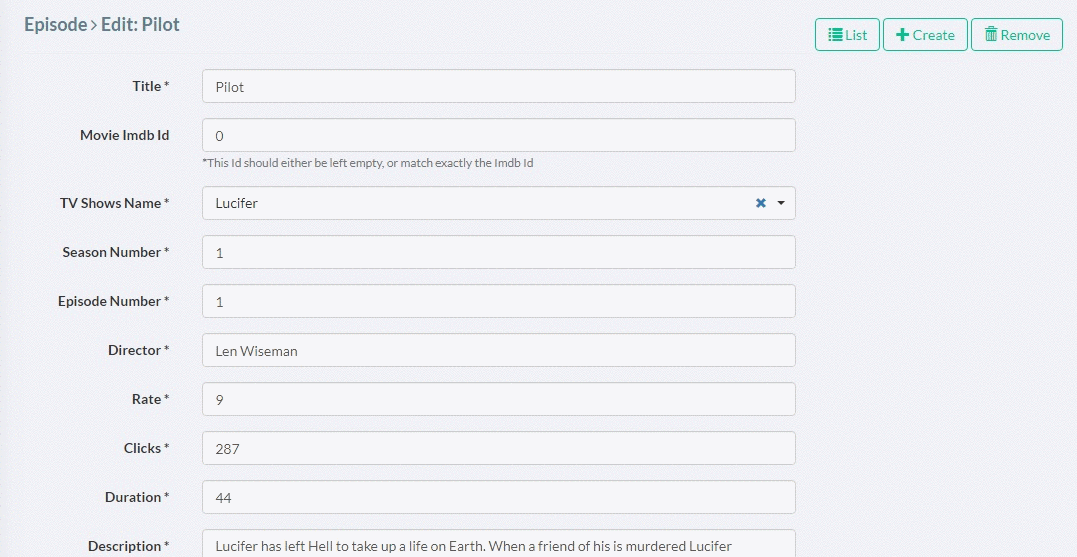
Episodes
-
Title – the title of the episode.
-
Movie Imdb Id.
-
TV Shows Name – you can choose one of the TV Shows you have created.
-
Season Number – you can choose one of the seasons you have created.
-
Episode Number – the number of the episode.
-
Director – the director of the episode.
-
Rate – the rating of the episode.
-
Duration – how long is the episode (in min).
-
Description – description about the episode, what will it be about.
-
Starring – the starring actors.
-
Trailer url – episode trailer.
-
Video scrubbing url.
-
Icon – you can insert an icon for the episode.
-
Image – you can insert an image for the episode.
-
Has adult content.
-
Pin protected – it will be required for the customer to insert the pin in order to watch the episode.
-
Is Available - if the season you are creating is going to be shown to the customer.
-
Expiration date – content right (for how long has the episode been bought).
-
Mandatory ads – diabled / enabled.
-
Revenues –episode revenues.
-
Bugdet – the budget of the episode.
-
SUBMIT.
EPG Import
EPG provides to the viewers detailed information about the TV program. It can include pictures, show description, title and casting information, but information depends on the selected EPG provider. There are several different views of EPG, matrix or horizontal EPG and vertical EPG. Before you import EPG Data you must first match channels ID with the channels. You do this by editing EPG with notepad ++ and then you copy the channel id from the EPG and paste it to EPG MAP ID. After matching the ID with the channels you can import the data.

For the EPG report you must:
-
go to VIDEO CONTET MANAGEMENT
-
click EPG Data
-
click import Data
-
click EPG

-
Enter channel number.
-
Delete existing data.
-
Generated with timezone.
-
Epg file encoding.
-
File input – epg import.
-
Enter the url for the epg file.

User And Roles
After clicking on Users and Roles you can see on the top left corner of the page Roles and you must click there.Also if you have existing groups you can invite people and categorise them in groups. In case you don’t have groups you can click Role and create a new group (eg. Content management group, IT group etc). Also you can give different permissions to each group.
To create a Role you must first go to :
-
Settings
-
Users and Roles

Group name – the name you want to give to the group.
Group code – you must choose from the dropdown list.
Is Available – if the group is available and you can invite people to be part of it.